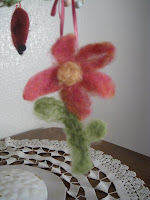
Spring! It's almost here and it feels like it too. Some weeks there might be snow on the ground and you'd swear we were in the depths of winter in the middle of March, but not today. The sun is shining the birds are singing (how cliche of me) and there are babies everywhere. Gavin is asleep in his bed, there are baby chicks in my bath tub, baby goats in the field and a kitten tearing around the house. Yep, it's spring alright. And even though there is more daylight in the evening I feel like there is less time than ever to do things, oh gardening season, where we work outside so long and don't get into the house until dark and then dinner ends up being around 9pm. It is totally worth it.
Well now, lets talk about something a little more fun. My sister and I went to a fiber arts convention called Madrona. It has amazing classes you can take and 40-50 vendors to shop from. Most of the vendors are semi-local yarn stores and local artists. It is a great way for fabulous small businesses to get out a bit . While we were there we came across a new felting technique, it is a little needle felting with a dash of wet felting and a heaping scoop of Easy! It's called art felt and is based around Artfelt paper which is a potato based paper that you place your design on, barley tack it down with a felting needle and throw it into the dryer. Alright you got me, there are a few more steps, but not many. I wanted to try it out by making a Spring ornament. I make these ornaments regularly with just the needle felting

method and they take me a little over an hour.
I have gathered all my supplies, pink wool for the flower head, a small amount of yellow wool for the center and green for the stem and leaves, a small square of the art felt paper along with a square of plastic (plastic wrap will do) make both pieces just slightly larger than the project itself, a knee high nylon, a felting needle and don't forget the foam felting pad
(a needle in the leg will add a painful note to the day).
Ready set go!
Step 1: Lay the Artfelt paper on the foam and let your imagination run. You are able to make double sided projects but remember the felting paper is always the bottom layer.
Tack your design down just enough to hold it to the paper.

Step 2: Lay the plastic on top and roll it up like a jellyroll. Plastic wrap worked well but next time I think I will use something a little heavier to be able and reuse it (waste not!).
Step3: Get it completely wet. Cold or tepid water works well, don't use hot water. Now stuff it in those old knee highs that have been banished to the back of the drawer (if you ever even owned any).
Step 4: Throw it in the dryer and turn it on high for about 10 minutes. Pull it out and give it a looksie, it probably won't be done yet but you can control the degree of felting by keeping an eye on it.
Step 5: Now comes the fun part! Take your project, put it in a bowl and add boiling water to it. The paper should be magically disappearing
before your eyes. After the cloud clears check out your newest creation.
Well it wasn't my most creative or dynamic project, but it worked well for a test run of the Artfelt paper. After all the supplies were readied it only took me 10 minutes to have my design ready to throw in the dryer and another 10 minutes in the dryer. That's fast considering this flower grew from a ball of wool. Here is the Artfelt website, www.itsartfelt.com . Happy felting!


 I am trying our a new motivational trick. I am going to blog my way through my next knitting project. I am going to knit my neice a sweater for this fall. I hope to document each day's progress in the attempt to expedite the project. The last baby sweater took over 6 months, lets not have that happen again. So here I go. I started the sweater yesterday waiting in the ferry line, thanks to an extra long ferry back up, I got further than expected The tiny tea leaves cardi by Melissa LaBarre, is a simple and very sweet top down sweater. The yarn is as local as you can get, it's called Moclips and is 25% mohair and 75% Coopworth lamb's wool, it actually comes from my shearing mentor (I thought this was too cool because my sister picked out the yarn). The only strange part about this pattern is how often you switch between needle sized, this is to get the puckered effect in the yoke. I am knitting size 2 for C, it will be large on her, but I am a very tight knitter so we will see. I did go up in needle sizes to account for my tension.